DIY Paper Butterfly: Construction Paper Butterfly Crafts (14 Steps)
Today me my little angel were watching Doraemon and friends cartoon show ( yeah you won’t believe even at 30s am still watching children shows on TV with my kids). Okay let’s get into the craft, on watching Doraemon and Nobita playing with butterflies, my little angel wanted to do a butterfly papercraft. As usual, I said let do it, soon we went to the nearby store to collect all the things we would need for this craft. As we don’t have enough supplies with us, since we have just started to do paper crafts – You’ll notice that in our crafts 😉

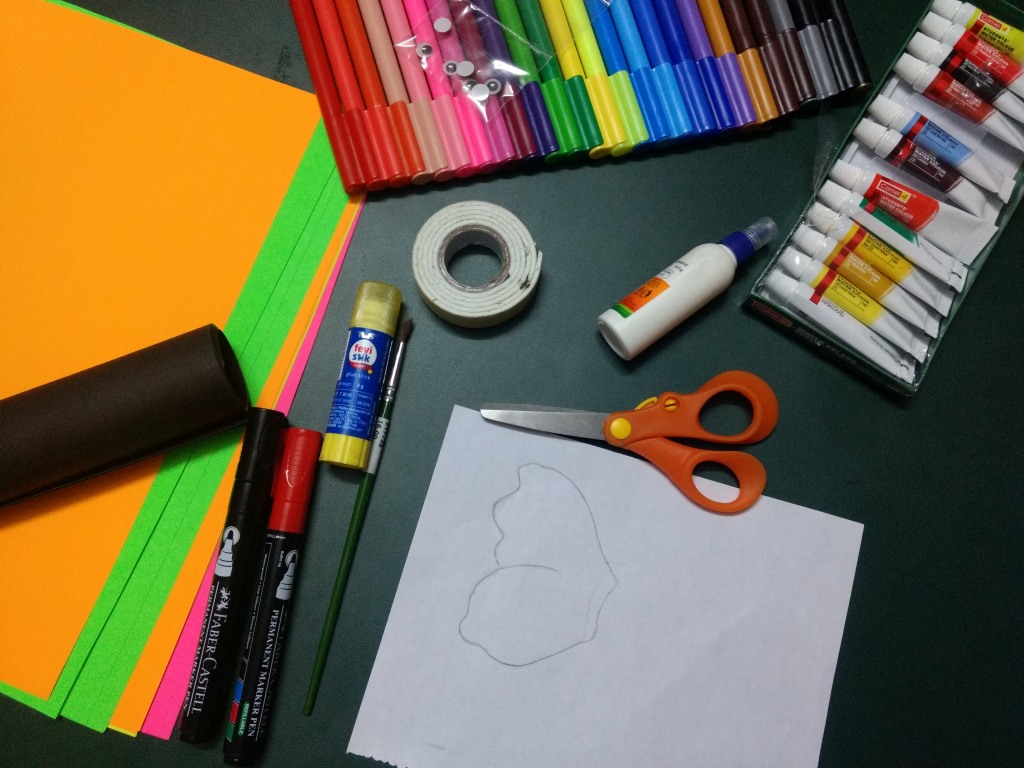
Things you will need
- Construction Paper
- Craft Paper
- Glue
- Scissors
- sketch (touch up)
- Pencil ( to trace and make stencils for wings)
- Watercolor ( Acrylic is good for morach butterfly wings pattern)
- Wiggle Eye stickers
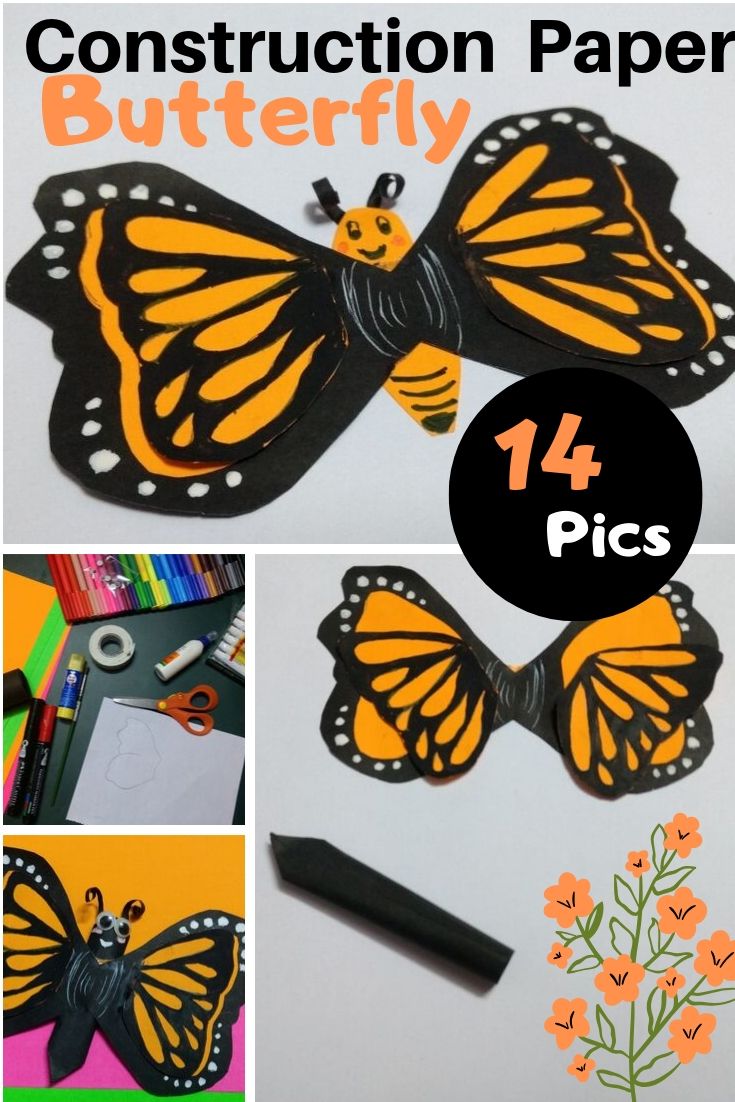
Construction Paper Butterfly Craft
- Get your supplies to your craft desk
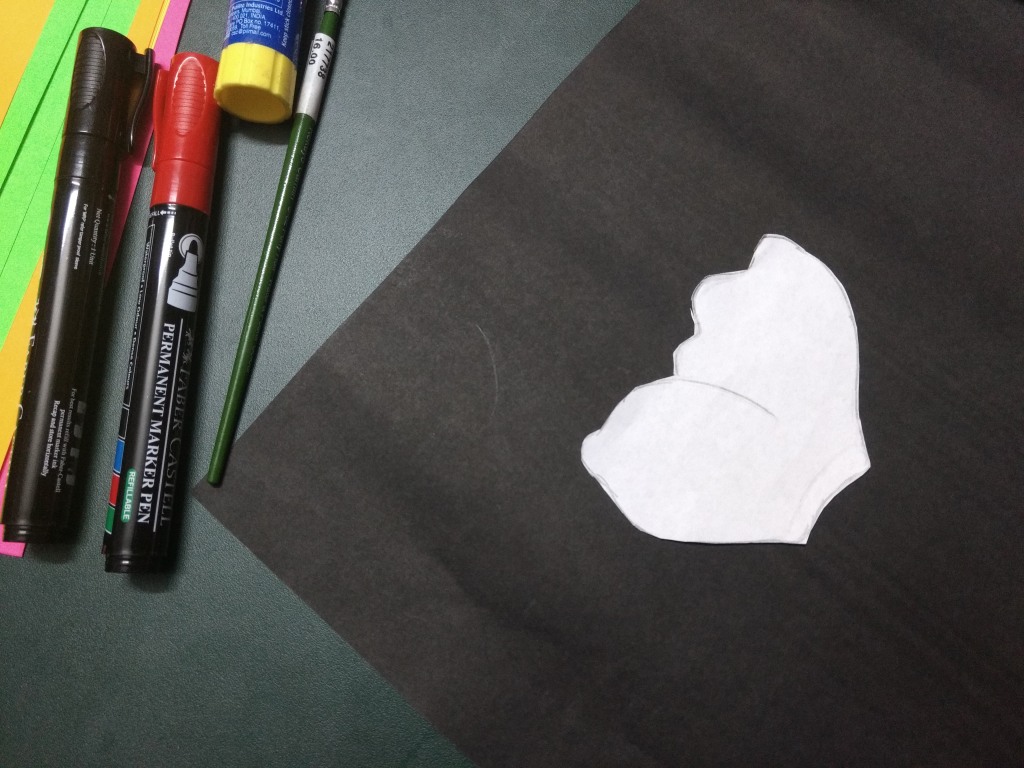
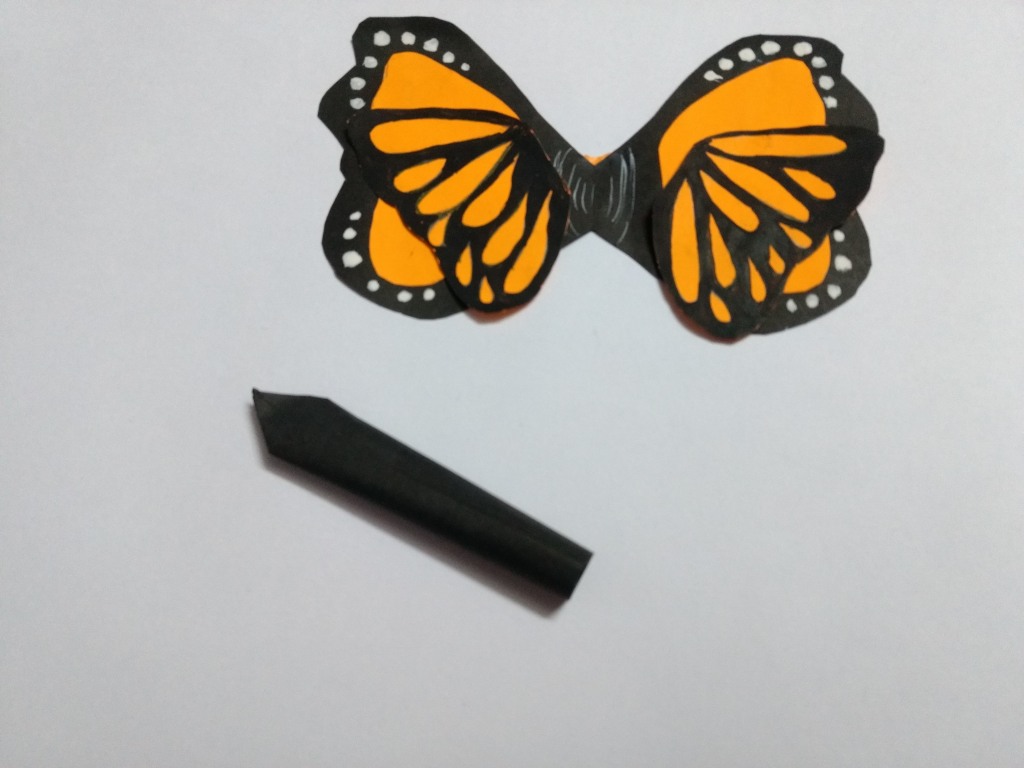
- Trace or draw one side of butterfly wings
- Trim and use it as a stencil and we shall use it for future butterfly crafts
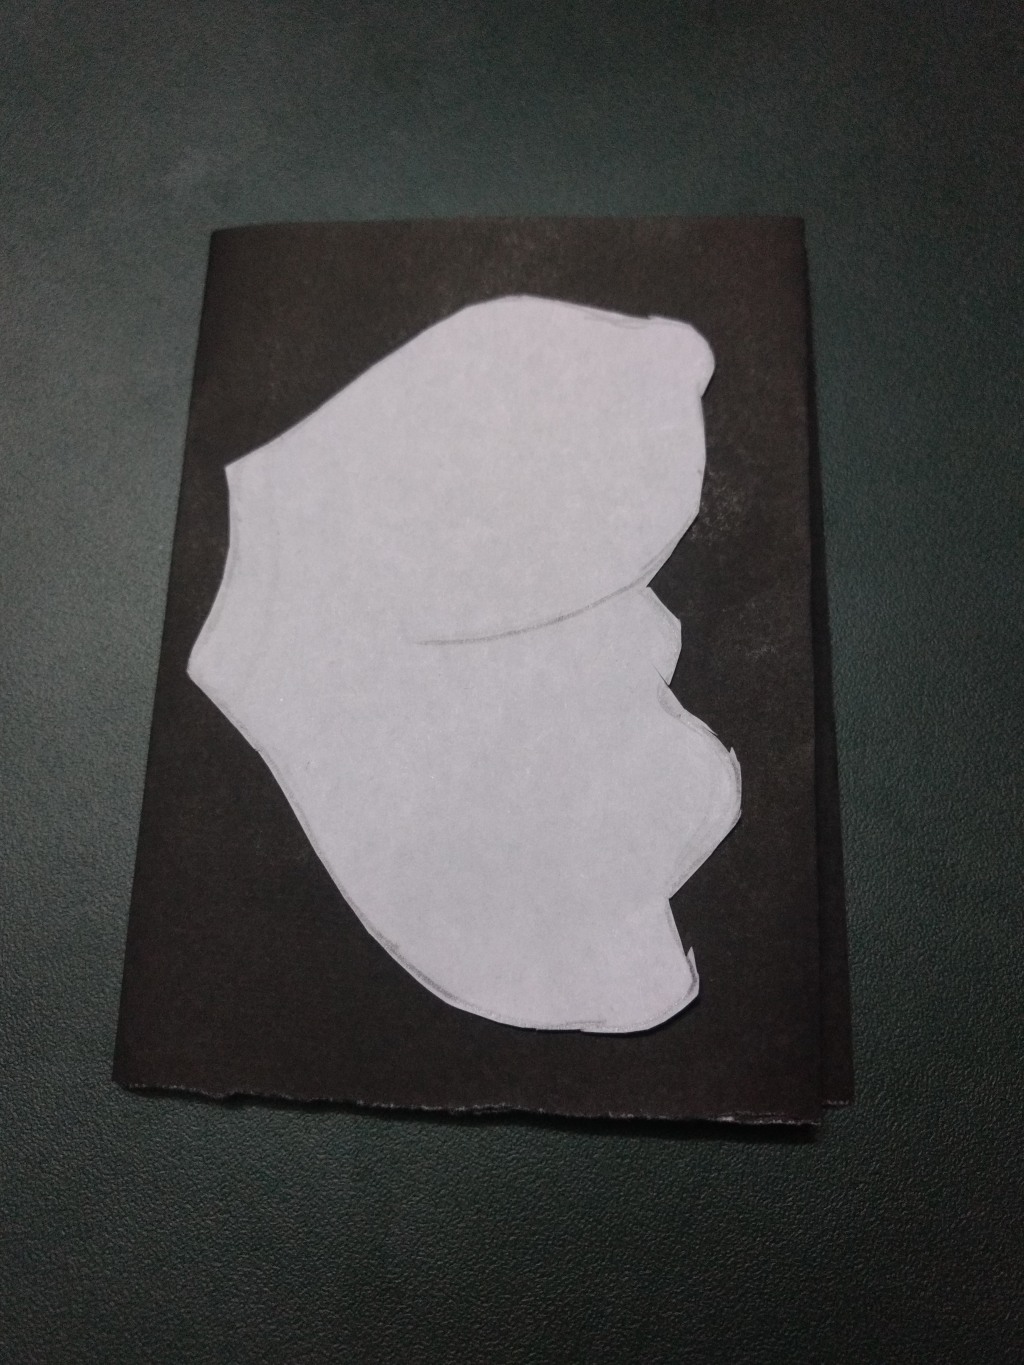
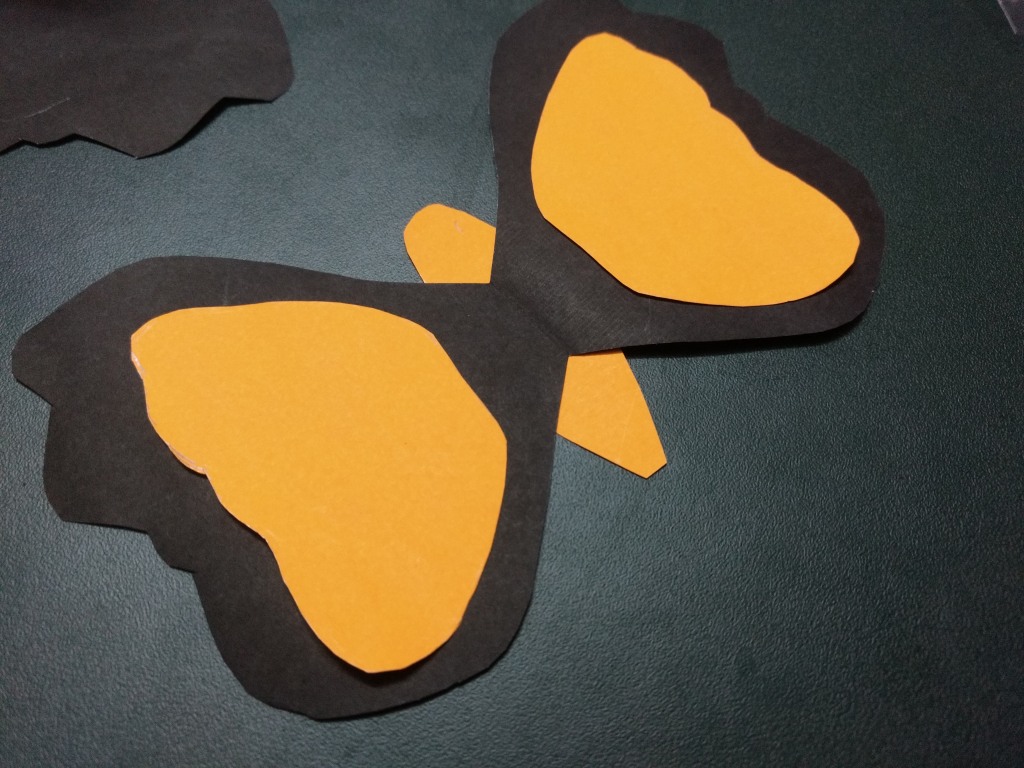
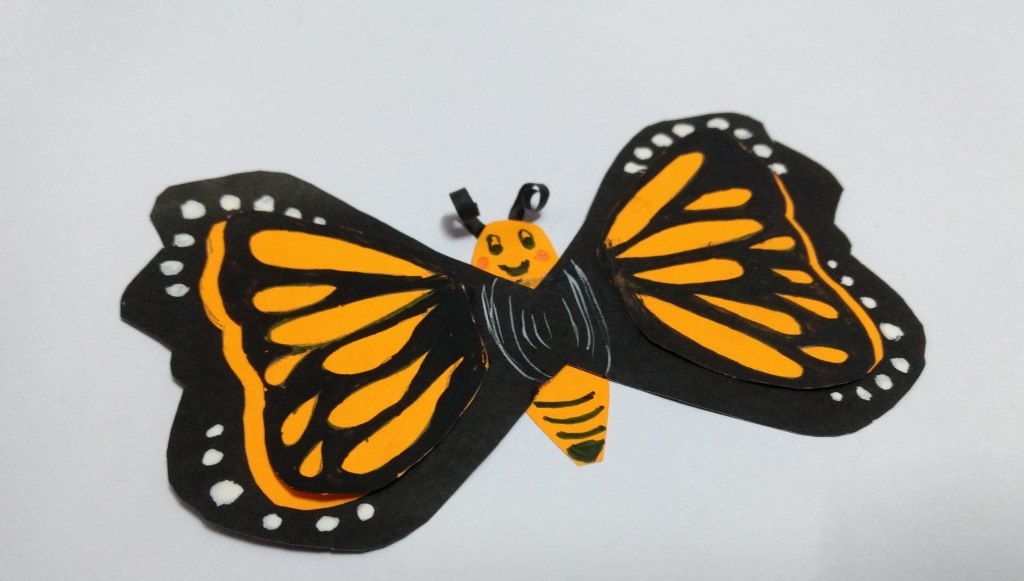
- We have opted for a black construction paper for wings and orange sheet for the inner pattern ( for our so-called monarch butterfly)
- Cut a rectangle out of the black paper, so that it can accommodate the wings stencil inside
- Fold it in a zig-zag style as we only have half wing after the trimming it, we will get the mirror image wings for our butterfly
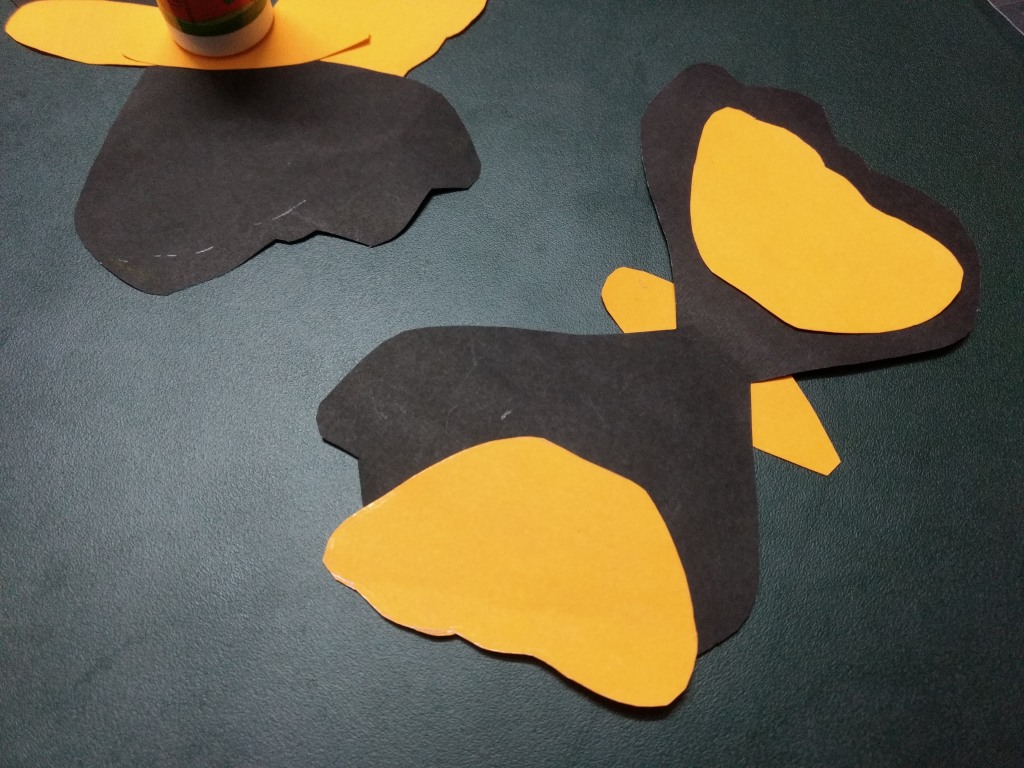
- Similarly, make a smaller size wing stencil, here you can fold it as you wish. Since we are going to place on the two sides of the wings
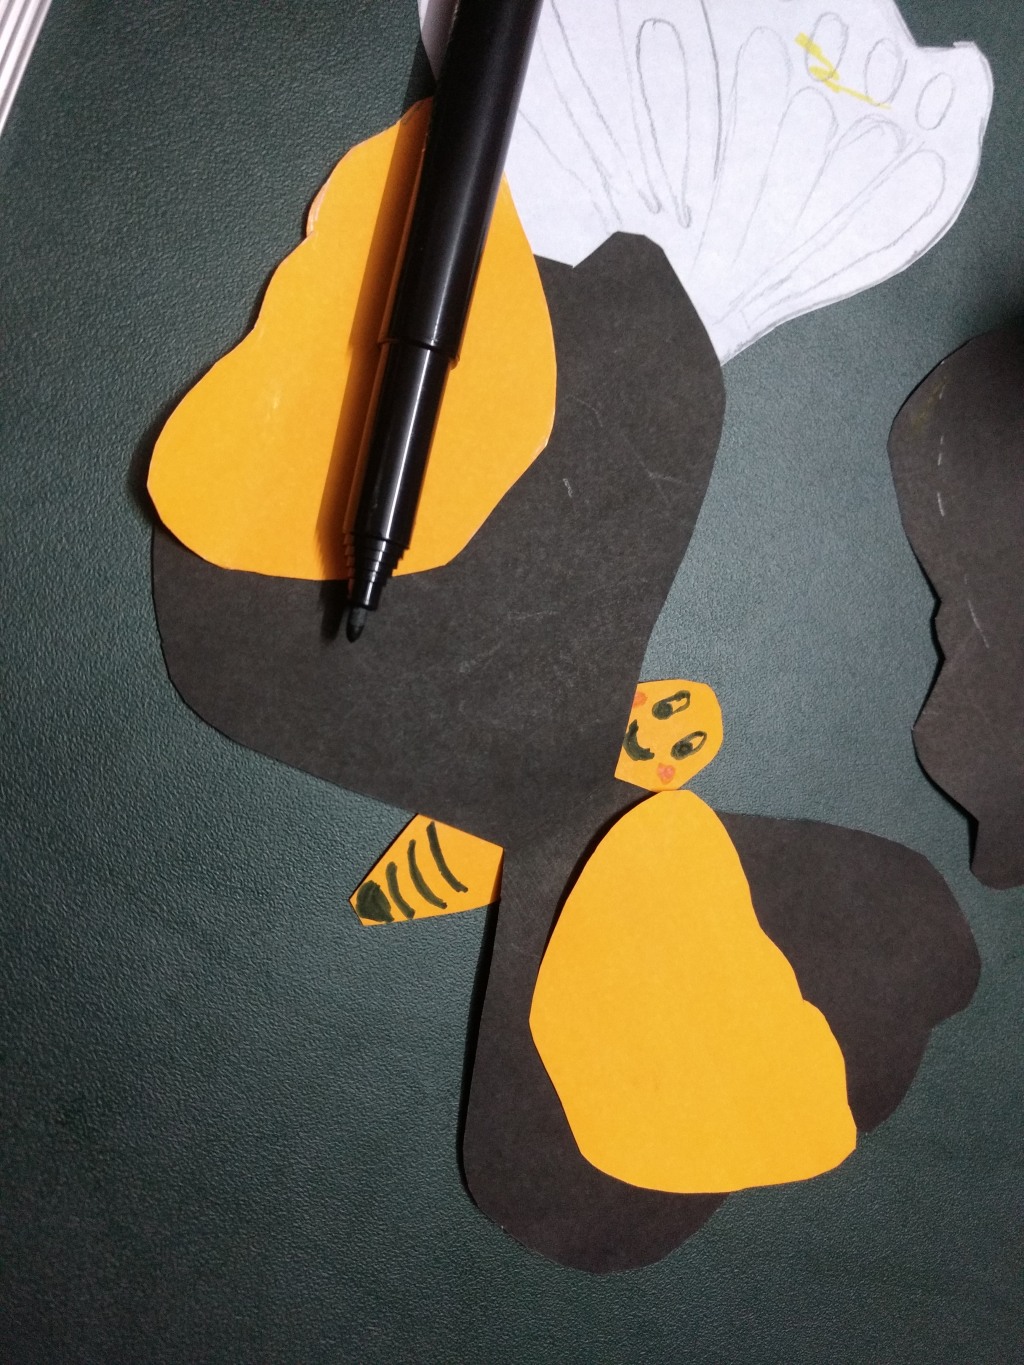
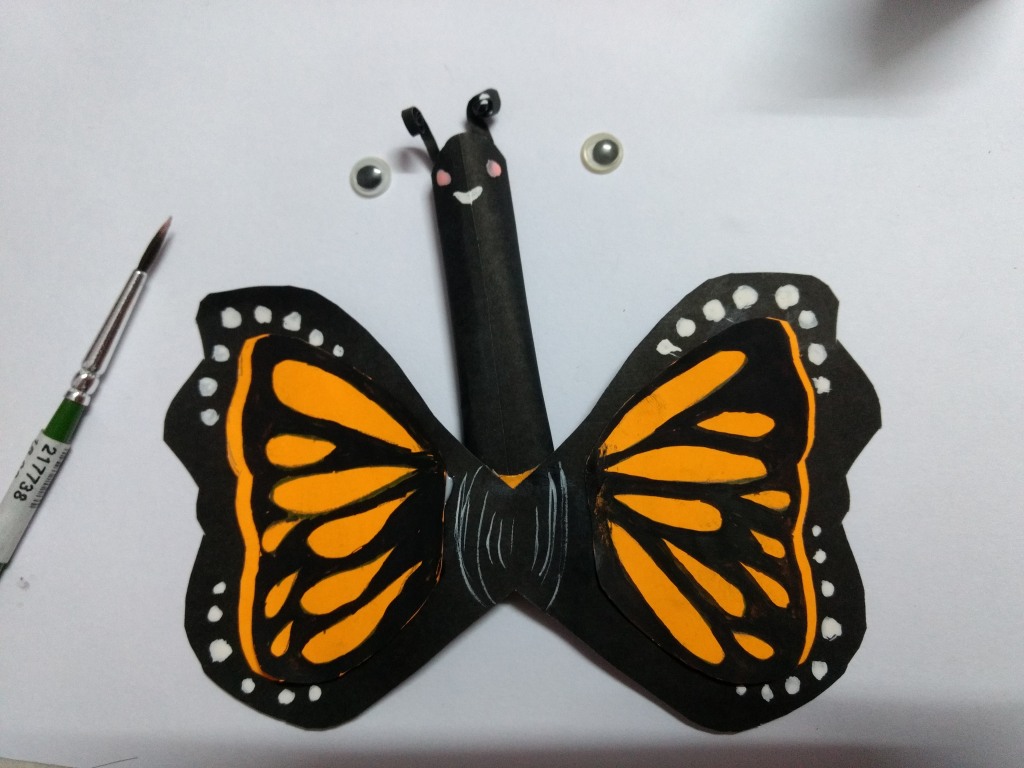
- Next, use an oval shape for the butterfly body, get it trimmed and make face and body lines.
- After sticking the orange wings part use watercolor/acrylic to make white dots on the edges of butterfly wings ( We were not satisfied with the output ( too simple, not even close).
- Or you draw butterfly wings pattern with a pencil and then color it with a black sketch or adults can help the children in coloring the wings with watercolor.
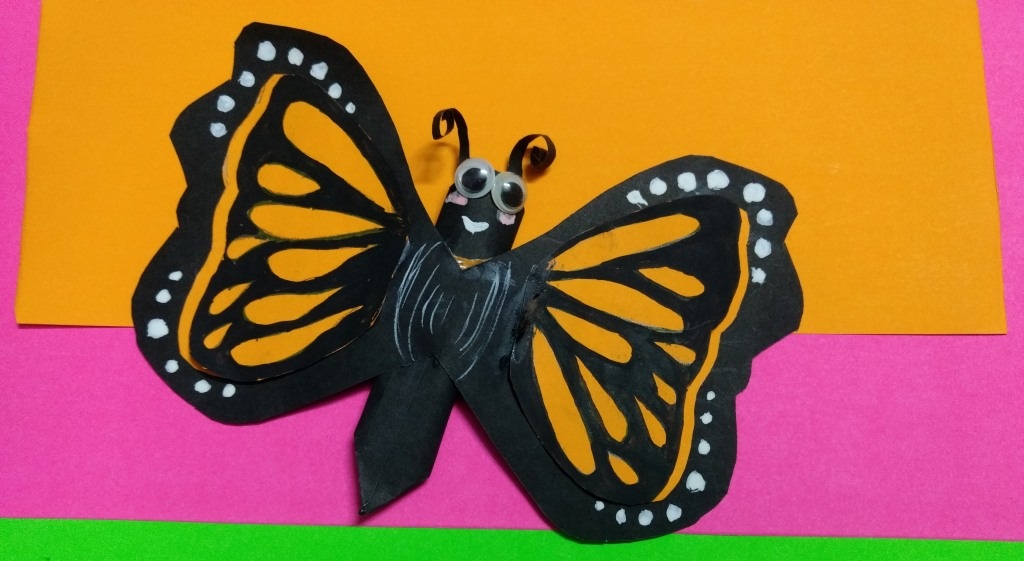
- Once done stick to the wings.
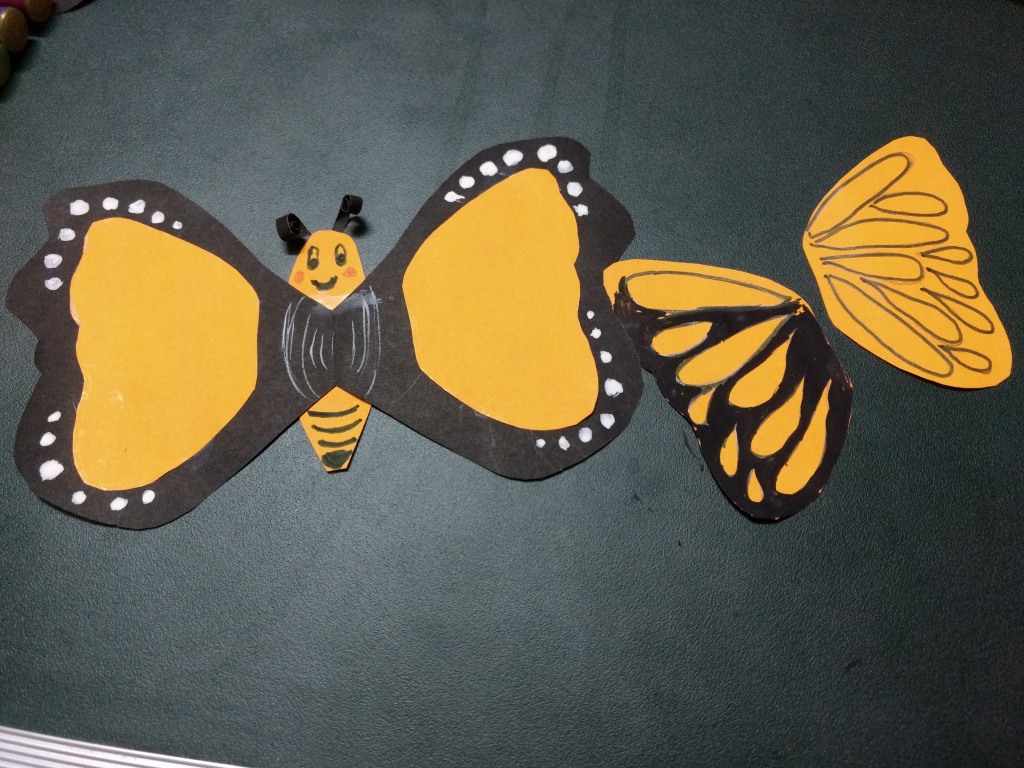
- Now for antennae, we rolled small and short black sheet ( scrap out from previous trim). and cut it into halves to get two antennae.
- Slightly unroll and stick it to head.
- For the second type – to make the butterfly body you can also roll the construction paper into a roll and stick the wiggle eyes and make blush with baby pink.
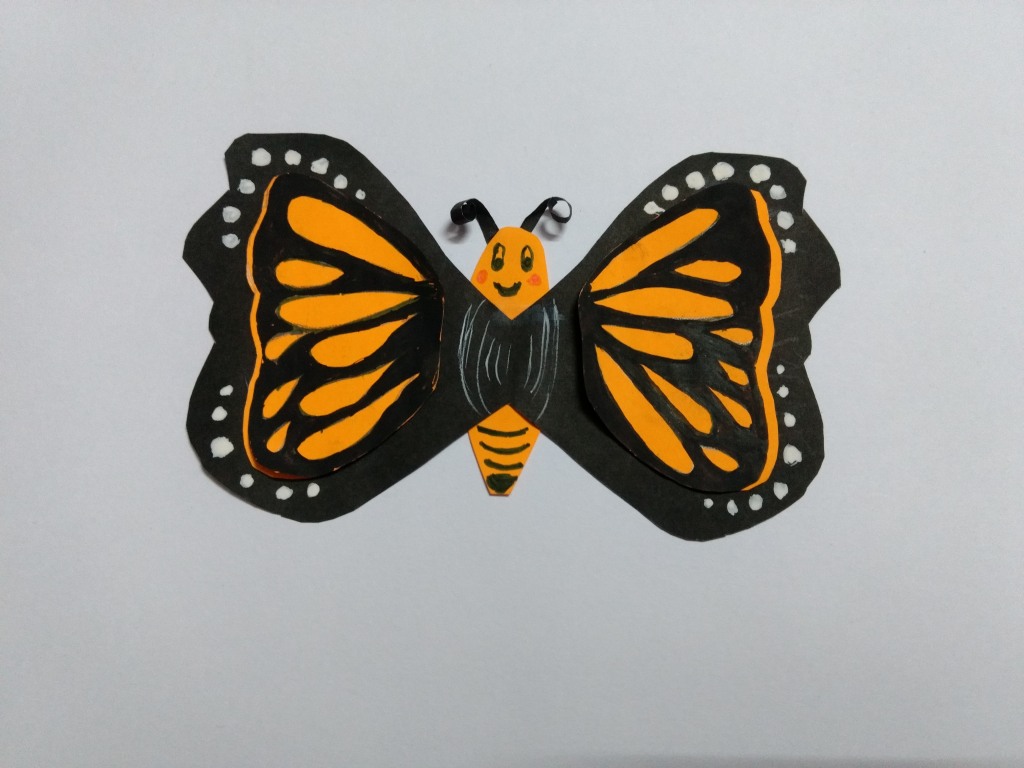
- Tada our construction paper butterfly is ready.
Butterfly Paper Craft Steps in pictures


Pin it for later


")


)